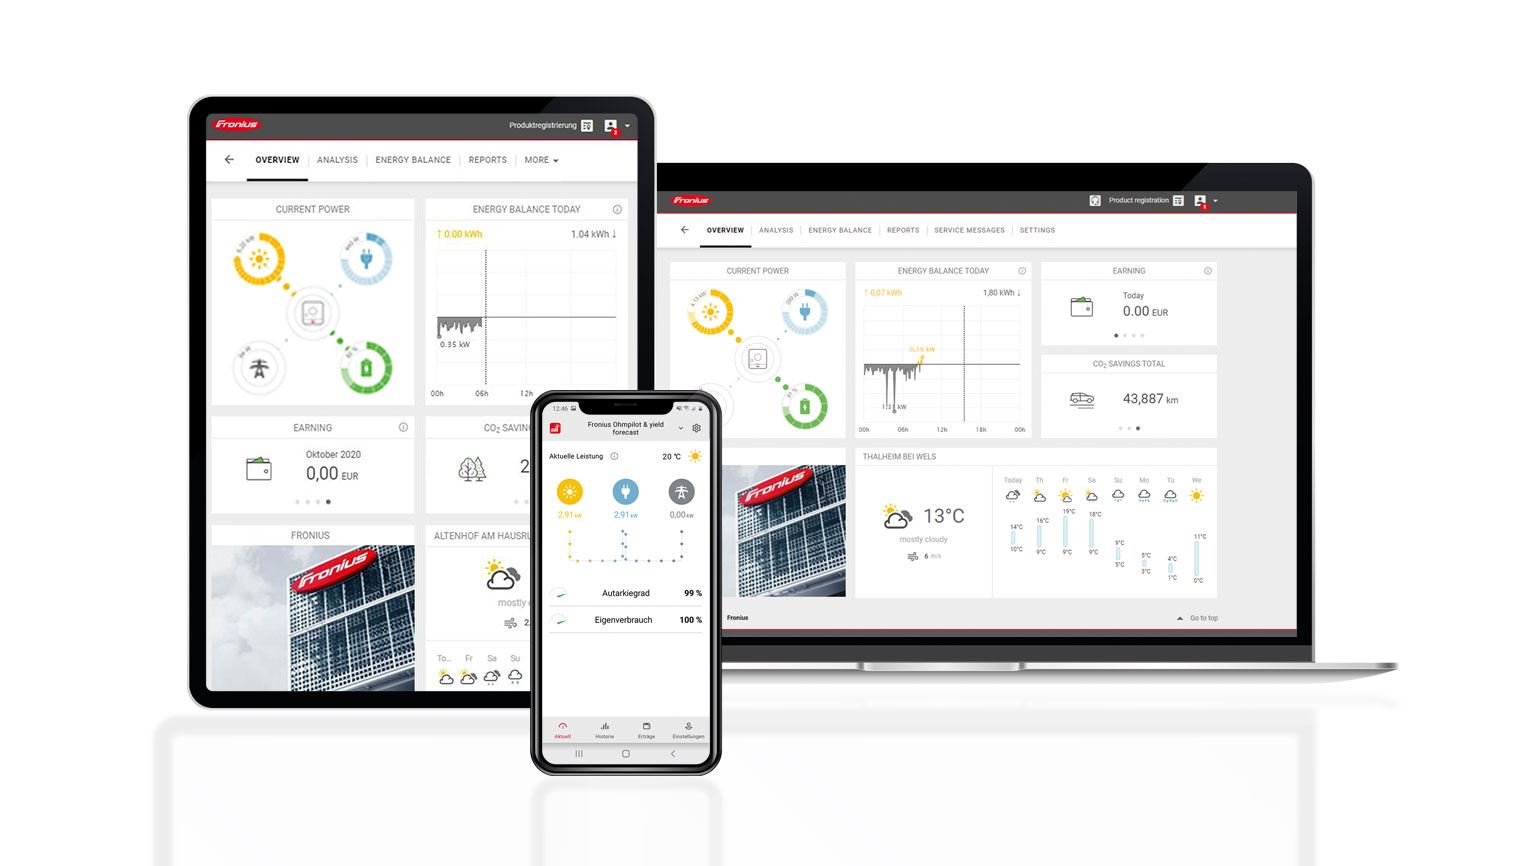

PV SYSTEM MONITORING With Fronius Solar.web
Step 1:
On your inverter, check the four LED lights on the Datamanager card, the LED labelled with a ‘tick’ and the LED labelled with a ‘cross’ needs to light up green. If they aren’t green, check to ensure the Datamanager card and termination plug is inserted correctly into the inverter.
Step 2:
Go to ‘SETUP’ on the inverter’s display and select ‘Wi-Fi Access Point’, then select ‘Activate Wi-Fi AP?’. If you’re using a Datamanager box, the IP switch must be at position ‘A’.
Step 3:
On your tablet/smartphone, access the App Store (iPhone) or Play Store (Android) and install the Fronius Solar.Web app. Go to your Wi-Fi settings and connect your tablet/smartphone to
the inverter’s network. The network name is Fronius_240.XXXXX (X’s replaced with numbers). Enter ‘12345678’ as the password.
Step 4:
Launch the SolarWeb app. The app may already recognise the connection to the inverter and a pop-up will display titled ‘Setup Wizard’, tap ‘Yes’. If it doesn’t automatically display, thentap the red button at the bottom right.
Step 6:
Select ‘SOLAR.WEB WIZARD’ to run the setup wizard. Input the date and time information and set time zone (this may already be filled in by your device), tap ‘Forward’.
Step 7:
Type your system name into the ‘System name’ box, then add the solar module power in Watts in the box titled ‘PV[Wp]’, tap ‘Forward’.
Step 8:
The next page will show a list of Wi-Fi networks, tap on your home network, and tap ‘Set’. A pop-up will display asking for the password, enter the password to your Wi-Fi network. Tap ‘Save’ then ‘Connect’.
Step 9:
Close the app and access your Wi-Fi settings. Change your device connection back to your home network. Open the Solar.Web app and wait until the network status appears. The ‘Internet’ section should show ‘available – yes’. Tap ‘Forward’.
Step 10:
Set up administrator password and tap ‘Finish’, the inverter has successfully been connected to the internet! Now you need to set up a SolarWeb account and add the system.
Step 1:
On the SolarWeb app, continue the setup Wizard. Tap ‘Register’ to create an account. On the next page titled ‘PV system’, enter the address and name of your system. Add your contact details, the time zone, and currency. Tap ‘Submit’.
Step 2:
Select ‘Add PV system’ on the next page. Now you have successfully registered your system to SolarWeb monitoring. Registering a PV system to SolarWeb Monitoring – Manually
Step 1:
Obtain the Datalogger ID from the inverter display (numbers from the Wi-Fi access point name, e.g., Fronius_240.#####).
Step 2:
Access the website www.solarweb.com and login. Click the icon that looks like a house and a plus symbol. An online form will display, fill in the information then click the ‘tick’.
Step 3:
Go to ‘MySystem’ ‘Devices’ and a landing page should display current power, energy today CO 2 savings and $ yield. It may take a few minutes to show.
Registration is complete!


Solar Link Australia is a Market Leader in Solar Photo Voltaic Supply and Installation. (EST 2010). Our team is committed to making renewable energy a major part of Australia’s energy base.


Ready to secure your deal? Request a callback now to lock in your price before the reduction takes effect!

Something isn’t Clear?
Feel free to contact us, and we will be more than happy to answer all of your questions.

or If you need quick assistance

or If you need quick assistance

or If you need quick assistance

or If you need quick assistance

or If you need quick assistance

or If you need quick assistance

or If you need quick assistance

or If you need quick assistance

or If you need quick assistance

or If you need quick assistance

or If you need quick assistance
Something isn’t Clear?
Feel free to contact us, and we will be more than happy to answer all of your questions.

Something isn’t Clear?
Feel free to contact us, and we will be more than happy to answer all of your questions.
2 Responses
I have lost my contact with my Fronius system with both home computer & mobile phone to access my system as it would not accept my email address or password. When I tried to put in a new password it would not accept it. I tried to ring your office & received recorded message to send email.
I am a very unhappy customer please ring me on 0149 597 679
Great guide! Setting up the Fronius Solar.web Wi-Fi monitoring was seamless thanks to your clear instructions. I’m excited to start tracking my solar energy production more effectively!