SolaX Pocket WiFi Set-Up
Step 1:
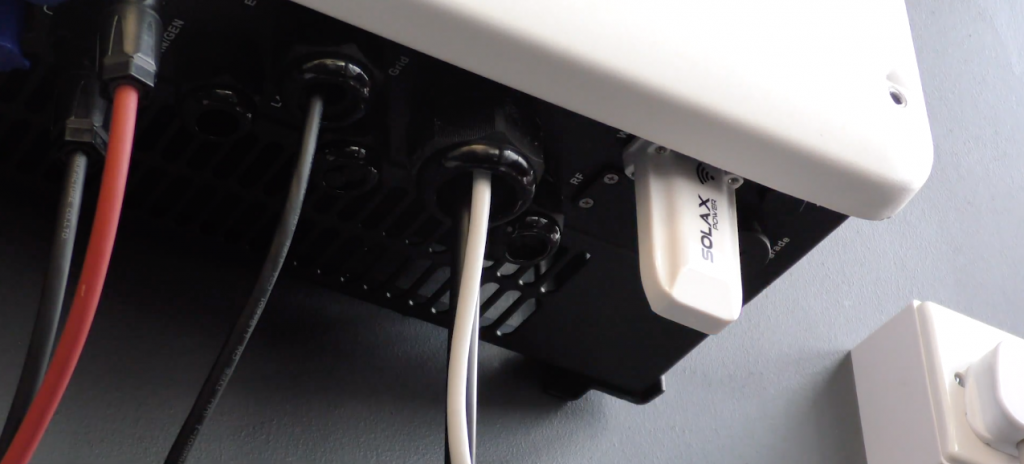
Plug in the Wi-Fi dongle into the Wi-Fi port at the bottom of your inverter. Go to your PC or Mac device and open the Wi-Fi settings. Connect to the network named SolaX ######. Once connected, access your web browser, this could be Google Chrome, Firefox, Internet Explorer etc. In the URL bar at the top, type the IP address 5.8.8.8 and press enter.
Step 2:
A box will pop up asking for a username and password, type ‘admin’ for both. The next screen will appear, click the ‘DHCP’ tab. In the box titled ‘SSID’ click the blue ‘Find AP’ button, a list of Wi-Fi networks will display, you will need to select your local home Wi-Fi network.
Step 3:
Your local network should now display in the ‘SSID’ box. You should also see a number appear in the ‘IP Address’ box, if you do not see this then the connection has not been successful. A possible reason for this is that you are connected to the 5GHz version of your network. Click ‘Find AP’ again and select your local network that is not the 5GHz version and then click ‘Save’. Check the IP address box again and the number should display. If this still have not been corrected, contact your local SolaX office for further advice. The Australian phone number for SolaX is 1300 476 529.
Step 4:
Once your local network is showing in the ‘SSID’ box and the IP address number is showing, type in your Wi-Fi password into the box labelled ‘key’. Please note, if your home Wi-Fi network has any special characters or spaces in it, they will be replaced by %20 by the system. You will need to manually add the spaces and special characters in. Once complete, click the ‘Save’ button.
Step 5:
Access the website ‘www.solaxcloud.com’ and click the orange ‘Sign up’ button. Enter in your information into the relevant fields. The registration number will be the last few numbers at the end of the SolaX Wi-Fi network name, e.g., ‘SolaX_#####’. Now select ‘Next’.
Step 6:
The next page will be titled ‘Add Site’, enter information into the relevant boxes. The map should auto generate to your location, if it does not then you can click and drag the map to the correct location. Now select the ‘Complete’ button, a notification box should come up titled ‘Add Site Successfully!’.
Step 7:
Go back and access the log in page. Log in to your account with the username and password you previously set up. A landing page will display with the summary data of your inverter. The inverter may take 5-10 minutes to start showing activity so please wait. If you have more than one inverter, click on the ‘plus’ symbol at the right-hand side of the page. Enter in the
registration number of this inverter into the field for your second device. Click the ‘Save’ button. You should now be able to see both inverters displayed. You have now completed your SolaX Pocket WiFi Set-Up!




Solar Link Australia is a Market Leader in Solar Photo Voltaic Supply and Installation. (EST 2010). Our team is committed to making renewable energy a major part of Australia’s energy base.




Ready to secure your deal? Request a callback now to lock in your price before the reduction takes effect!

Something isn’t Clear?
Feel free to contact us, and we will be more than happy to answer all of your questions.

or If you need quick assistance
or If you need quick assistance

or If you need quick assistance

or If you need quick assistance

or If you need quick assistance

or If you need quick assistance

or If you need quick assistance

or If you need quick assistance

or If you need quick assistance

or If you need quick assistance

or If you need quick assistance
Something isn’t Clear?
Feel free to contact us, and we will be more than happy to answer all of your questions.

Something isn’t Clear?
Feel free to contact us, and we will be more than happy to answer all of your questions.
10 Responses
I Solax cloud system, when creatING a new site, and when I want to add device, I have to put the registration no., I put the serial number of Pocket_wifi, I got this message :
“this registration no. has been used”
THEREFORE, I CAN’T USE IT, AND I CAN’T REMEMBER WHERE I USED IT.
ANY SOLUTION PLEASE
Hello Gazy,
Did we install your system?
Anyway, It shows that the SN is already registered to an account.
Best thing to do is to contact SolaX directly.
1300 476 529
I am unable to connect to Solax wifi on my iPhone or iPads and I don’t own a laptop . Is there any way to connect my phone or iPads please
I am unable to connect my iPhone or iPad to Solax wifi new inverter was installed yesterday 19/04/2023 please advise as I do not own a laptop
My dongle does not recognize the admin user/password…what can I do?
Hi there, I have a solar power system and trying to load the app on my Samsung mobile.
I’m at the device set up and cannot find the registration number. Can you tell me where I can locate it please?
Thank you.
Hello Estelle,
The registration number is the serial number on your Solax Dongle.
Regards,
Solar Link Technical Support
Hi there
Trying to set up the app, it says my registration number is invalid? What do I do now?
Thanks
Hello Stephen,
The registration number is the serial number on your Solax Dongle.
Double check if the characters you inputted are correct.
If you’re still having issues, you need to contact Solax directly; they can provide you with a new dongle if it’s confirmed to be faulty and if it’s still under warranty.
Regards,
Technical Support
//Solar Link Australia
hello I have the name and solax device in my rent, but it always has no connection, can you help me?